
A cue tip goes flat so slowly that you never catch it happening. There is no crack, no rattle, no warning. One Tuesday you are playing fine. Six weeks later you are steering the cue ball instead of stroking it, and you could not tell me when that started if I paid you. I have watched it happen to my own cue over and over, and to half the guys on my league team, most of whom have never once looked at the thing on the end of their shaft.
The fix does not need a lathe or a steady hand you do not have. The Cuetec Bowtie is a small metal tool, 2.63 inches long, 1 inch wide and 1 inch tall, 9.07 grams on the scale, and it does three jobs on a cue tip. It shapes a dome. It roughens the leather so chalk grabs. It pierces tiny holes so the chalk has somewhere to sit. Cuetec calls those three the shaper, the scuffer and the aerator. Mine lives in the zip pocket of my case with the chalk, and it has replaced a folded sheet of sandpaper and a lot of guesswork.
Your tip is probably flatter than you think. Four minutes is all it takes to find out.
The Cuetec Bowtie puts the shaper, the scuffer and the aerator on one piece of metal that fits in a case pocket. 4.7 stars across more than 4,000 reviews. Nothing to charge, nothing to adjust.
Amazon Check Today's Price on Amazon →Step 1: Look at the tip before you touch it
Tip care starts with ten seconds of looking, not filing. Hold the cue up so the tip sits against a light and roll it slowly. A flat spot shows as a dull band where the light does not catch the leather. Turn it and look again. Most players have one flat area right where their stroke naturally lands, and it is almost always a little off center, which is worth knowing about your own stroke.
Then run your thumb around the edge where the leather meets the ferrule. If the leather overhangs and feels like a small lip, the tip has mushroomed. That happens to any tip that gets played a lot, and it matters more than people think. A mushroomed tip does not meet the cue ball the way a dome does, so the ball comes off at an angle your arm did not ask for.
Last thing to check is how much leather is left. The Cuetec tool shapes and roughens, it does not add material. If the tip is down to a thin cap, put the tool away and have a new tip installed. Shaping a worn out tip just gets you a worn out tip with a nicer looking curve, and it will let go in the middle of a rack.
I learned the measuring part the hard way. A couple of winters back I decided my tip looked low and went after it with sandpaper on a block, no shaping, just removal. Twenty minutes later the tip was thinner and still flat, and I had taken weeks of leather off for nothing. That is the mistake this step exists to prevent. Hold the cue up, roll it under the light, and be honest about how much material is actually left before you touch anything.
Step 2: Cut a dome with the shaper
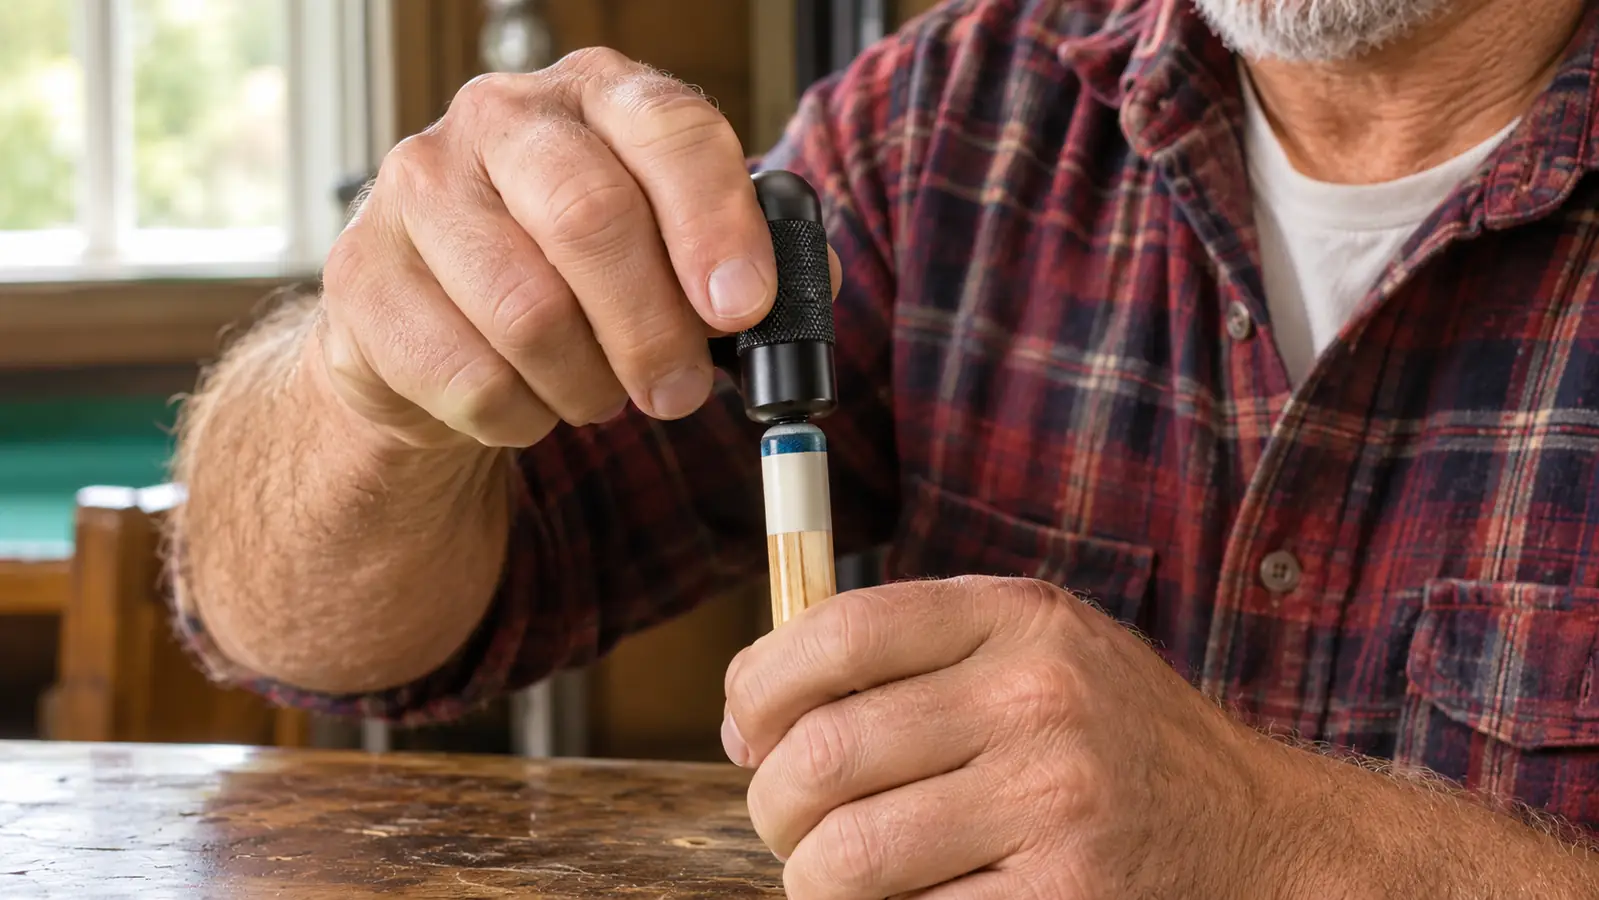
The shaper is the cutting side, and it is the part people misuse. You are not trying to remove the flat spot in one pass. You are trying to put a curve back on the leather. Set the shaper against the tip at a slight angle and turn the cue slowly with light pressure, the way you would sharpen a pencil if you actually cared about the pencil.
Work in short passes, four or five turns, then stop and look. Cuetec's instruction is to use the shaper to find a comfortable dome contour, and comfortable is the right word for it. Most league players I know want a curve about the shape of a nickel sitting on the tip. A sharper dime shape rewards very precise contact and punishes everything else. If you play once a week, the flatter curve is the friendlier one.
Keep the pressure light and the passes even. Heavy handed shaping is how people end up with a tip that is flat on one side and tall on the other, and an uneven tip will pull your stroke off line without ever telling you why. When the dome looks the same from every angle you roll it to, you are done with this step.
Two or three passes are usually enough for a tip that only got a little flat. If you have been playing the same tip since summer, expect to spend a couple of minutes. I set the butt of the cue on a folded towel on the kitchen table so it does not slide around, and I turn the cue rather than the tool. That sounds like a small thing. It is the difference between an even dome and a lopsided one you will fight for a month.
Step 3: Roughen the leather with the scuffer
Now the tip is the right shape and probably still glassy. Glazing is what happens when leather gets compressed and polished by chalk and cue balls and a few hundred racks. A glazed tip feels slick under your thumb, and chalk sits on top of it instead of into it. That is where a lot of miscues come from, and it is rarely the stroke people blame.
The scuffer is the rough face on the Cuetec tool. Its job, in Cuetec's own wording, is to gently roughen the tip so it holds chalk better. Gently is doing the work in that sentence. Two or three light passes across the dome is plenty. The guys who scrub at it like they are sanding a door end up with a tip that wears out in a month and a ferrule full of grit.
Wipe the dust off with your thumb or a cloth before you go on. If you are doing this at the hall, do it over a trash can or a napkin. Tip dust is fine and dark and it gets on everything, including the cloth, and the room owner will not thank you for it.
Six weeks of Tuesday nights is enough to flatten a tip. Four minutes with the Cuetec Bowtie is enough to bring it back.
Step 4: Pierce it with the aerator
The aerator is the part nobody uses and the part I have come to like most. It pierces the surface of the tip with tiny pinholes. Chalk is a powder, and powder needs somewhere to sit. A pierced tip gives the chalk a place to go, so it stays put through the hit instead of flying off on the follow through and dusting the cloth.
Light touch here. You are piercing, not drilling. A few presses across the dome, rotating the cue between them, is enough. If the tip starts looking chewed rather than textured, you have gone too far. I have seen a tip punched through that way, and it was already a thin tip, which is why step one exists.
The first time I used the aerator I went too hard and the tip looked like a pincushion. It still worked, but the chalk sat in the holes unevenly and the hit felt a little mushy for a couple of days until the leather settled down again. Now I do about eight light presses around the dome and stop. If you can see the holes clearly in ordinary room light, you have done enough.
Do this after scuffing, not before. The scuffer opens the leather, the aerator gives that opened surface some depth, and then the chalk has both. Reverse the order and you are mostly wasting your time.
Step 5: Chalk it and hit balls
Chalk it properly, which means twisting the cube against the tip rather than boring a hole in the middle of the chalk. Every player has watched someone grind a crater into a cube and then wonder why their tip is always shiny.
Then go hit some balls. Not a whole practice session, just enough to feel it. Set up a few center ball shots, then a draw shot, then a stop shot. If the tip is right, the cue ball does what your arm told it to do. What you will notice first is not extra spin. It is fewer of those hits where the ball leaves the tip at an angle you did not plan, the ones you write off as a bad stroke.
Give it a few racks before you make up your mind. A freshly shaped tip plays a little different for the first hour, and that is normal. It settles in.
What Else Helps
Keep the tool in your case, not in the drawer at home. The whole point of something this small is that it is with you when a tip goes slick in the middle of league night and you have three matches left. Mine sits in the zip pocket next to the chalk, and it has bailed me out more than once.
Check the tip once a month whether it looks like it needs it or not. Six weeks is roughly how long my cue takes to go from a good dome to something flatter, and yours will be different depending on how often you play, how hard you hit, and whether your tip is a soft one or a hard one.
One more habit worth building: check the tip before you rack the first game of the night rather than after. The hall is warm, your hands are clean, and you have five minutes before your match is called. Doing it at the end of the night, when the table light is already off and you are packing up, is how a tip gets ignored for another month. I keep a folded napkin in the case too, because that dark dust gets into everything it touches.
Do not let anyone break with your playing cue. Breaking is the fastest way to flatten a tip and mushroom a ferrule, and the guy who asks to borrow your cue for one break is always the guy who hits the ball like he is angry at it.
Keep chalk off the ferrule. Dust works its way into the seam between the tip and the ferrule, and over a couple of years that seam is where trouble starts, usually as a tip that will not stay put no matter how well you shape it.
What the Bowtie Will Not Do
Two things worth saying plainly. It will not make you a better player. Practice does that, and anyone telling you otherwise is selling something. What a maintained tip does is stop getting in the way of the stroke you already have, which is a smaller claim than most gear writing makes and the true one. I still miss balls. I just miss them for reasons I can name now.
It also will not rescue a tip that is too far gone. If the leather is thin, or the tip is loose, or the ferrule is cracked, the tool has nothing to work with. I tried to stretch another month out of a worn tip once, and I paid for it with a miscue on an easy eight ball in a match that counted. This tool has held up for me over a couple of seasons, and it does the same job as the sandpaper and block method most of us learned from an old timer, with a lot less guesswork.
Four minutes before league night beats a new tip you did not need.
One small metal tool with the shaper, the scuffer and the aerator. 2.63 inches by 1 inch by 1 inch. 9.07 grams. It drops in a case pocket and it is there when a tip goes slick at the worst possible time.
Amazon Check Today's Price on Amazon →